


Firstly, I changed the colours. I changed the white background to a pale brown colour and edited the colours and tones of the mountain photo by using the blending options.

I then added a 'grunge' texture to the whole poster and laid over it. I edited the opacity settings to make the texture more transparents and subtle so that it would blend in well with the poster. I also changed the blending options of the text so that it would match the style of the rest of the poster.


Shapes Poster:

Firstly, I created all of the shapes and tried to make them exactly the same size and colour as on the original. The triangles and circle were easy to create, and to create the rainbow shape I drew concentric circles and then cut them in half. I then coloured all of the shapes the same colour as in the original and then changed the blending options for each shape to 'multiply' to create the transparent effect. I also ensured that all of my layers were in the right order so that the correct shapes sat on top of each other in the right order.


I firstly added a texture over the top of the photo and edited the opacity so that it blended in with the photo.

I then used a smudged brush tool to paint lens flares onto the photo in bright purple.

Finally, I added a block of purple over the top of the photo and changed its opacity. I then painted white dots with the same smudged paintbrush around the edge of the photo.

Text and Layer Styles

I began with my text on a simple green background. I chose to use the font 'Travel Book' downloaded from FontDoc to go with my travel-themed idea.
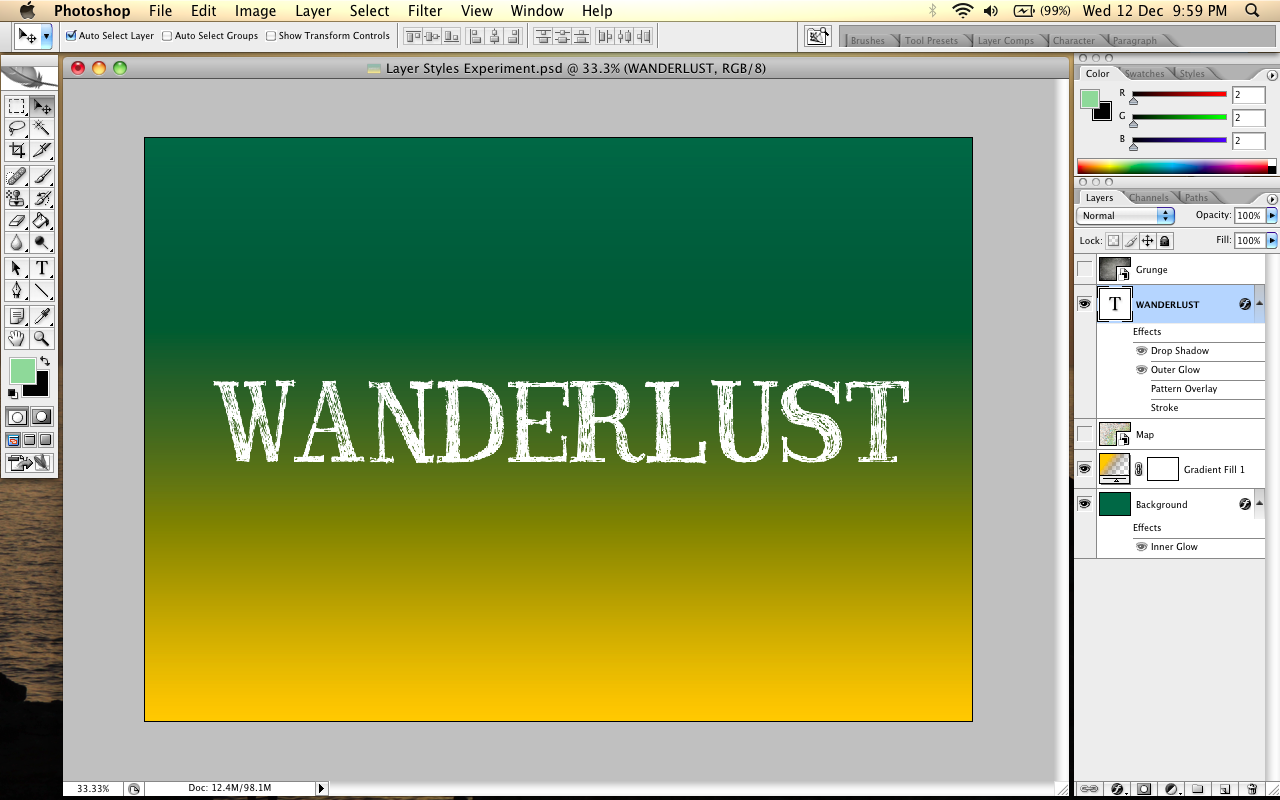
I then added a gradient of a contrasting yellow/orange colour to the background. I made the gradient horizontal with the lighter colour at the bottom.

Next, I added an overlay image of a map, continuing with my travel theme. I changed the opacity of the picture to make it transparent so that the background colours would seep through.

I then added another overlay image, this time a grunge texture. I changed the opacity of this image, too, so that both the background colours and the map would seep through, blending all of the background layers together.

Finally, I added effects to the text. I added a subtle drop shadow to the text and a soft light outer glow. I also added a slightly dark inner glow to the background to darken the edges of the canvas and add to the weathered look.

No comments:
Post a Comment